This article was posted on the Game Watch Japanese game news site on February 17th, 2012.

Location: Silicon Studio HQ
You’ve probably heard the phrase “post-processing” at some point. In general, “post-processing” in filmmaking refers to the post-production work of editing, sound mixing and finally mastering. But for game graphics, it is commonly used to refer to "touching up" rendered effects.
The most common post-processing done on personal computers is probably retouching photos. Removing red eyes when a flash was used, adjusting colors, sharpening out-of-focus shots or intentionally blurring parts you want to hide... Many people have done this type of retouching on their home computers. Recent purikura (photo sticker booths) are another example. In fact, the "touching up" available in purikura, such as adding gentle flares around the people in the photo, retouching skin, adding eyelashes or a second eye-fold, enlarging eyes...it's all quite over the top.
Up for review is Silicon Studio’s middleware YEBIS, which works in a different genre and has a different goal, but handles the same type of post-processing. However, YEBIS is not a photo retouching software. Instead it is used for the post-processing of real-time rendered graphics. And its primary application is for 3D game graphics.
When you see the relatively rich graphics in current games on the PlayStation®3, Xbox 360® or even PC games, you can be sure that you’re looking at graphics that have been produced with some type of real time post-processing effects. YEBIS is a middleware system for carrying out real time post-processing for this type of game graphics.
3D game graphics use material expression shaders assigned to the 3D model based on the light source to calculate and render the shadows that should be visible from particular points of view. However, this method alone leaves you with very “CG-looking” graphics that lack a certain richness. In the real world, we view our surroundings with the human eye or throughimages recorded with a camera. But naturally, 3D game graphics cannot be rendered with this factor in consideration.
While some approaches try to emulate real life as much as possible, game graphics prioritize real time processing and can hardly be said to be realistic looking. The post-processing in real time 3D graphics uses an image processing type of approach for graphical expressions that are difficult to handle with orthodox methods.
Also, in the case of game graphics, it is not just about creating images that are close to the real world. In fact, they tend to place a greater emphasis on achieving movie-like artistry with a highly dramatic feel. Since videos created with normal rendering methods are computed by fixed algorithms or simulation effects, they do not automatically work hand in hand with the game content (story progress etc.) on an emotional level. Post-processing also plays a vital role in allowing the video creators/game creators to introduce their own personal touch to uneventful rendered images..
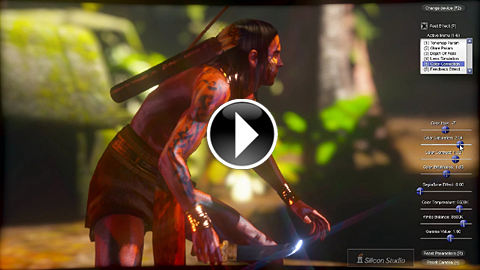
Though this report is an introduction to the middleware YEBIS, you can also discover what post-processing for cutting-edge game graphics is. Before we go on, let me try to capture your interest by showing you a sample of what YEBIS can do. Just to remind you, although these are being presented as movies, they were all created by real time rendering.

The first 2 scenes show a comparison of normal rendering, with no post effects, and those with post effects. The latter half shows various optical effects created with YEBIS.
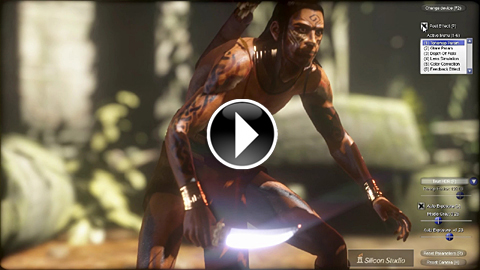
Demo with YEBIS effects alternating on and off.

Masaki Kawase (Silicon Studio, R&D General HQ, Research Group, Lead Software Engineer, Shader Architect)

"Wreckless " action game for the Xbox released in 2002 by Bunkasha
Before we get into this subject, let me briefly introduce my guest today, Mr. Masaki Kawase. Masaki Kawase is such a respected leader in the field that anyone involved in the world of real time 3D graphics development should know his name.
There was a period when the first Xbox was not yet popular and the PS2 alone was keeping the Japanese game market alive. At that time, the cutting edge game developers were unable to smoothly switch over to programmable shader technology and were somewhat behind Europe. During this period, Mr. Kawase was the only person who continuously provided information about practical programmable shader technology to the Japanese game development scene.
From the time he was a student, in fact from before the time 3D graphics rendering acceleration could be handled on a PC, Mr. Kawase was already famous on the internet among the R&D community for his interest in 3D graphics technology development. But it wasn’t until Bunkasha released “Wreckless” on the first Xbox that the rest of the world learned the name “Kawase”.
The graphics in “Wreckless” were so advanced that they would compare well even against recent game graphics. “Wreckless” first went on sale in 2002, 10 years ago, soon after the first Xbox was released in Japan and it stunned game fans that were not used to seeing programmable shader graphics. Many people were moved by the high quality of the graphics and, at the same time, simply could not understand the system that even made such graphics possible.
That same year, at the 2002 CEDEC conference for game developers, , Mr.Kawase frankly revealed the technology behind the graphics in “Wreckless” . These days, it is not rare for a company to reveal the technology behind a current title, but at the time it was highly unusual. In a sense, I think that the recent tendency within the Japanese game development community to “improve overall Japanese game development by sharing basic information” had its start with this presentation about “Wreckless.”
The following year, the programmable shader technique used by Mr. Kawase in “Wreckless” was also presented at the GDC 2003 held in America. Although most of the Japanese game development community was still asking what a programmable shader was, it was from this time that Mr. Kawase began sharing information with the rest of the world.
There are many different graphics technologies that are applicable to the programmable shader base that Mr. Kawase presented. Among them is the method for rendering effects using reduction buffers that is so famous that it is known worldwide as the “Kawase Method.”
Even today, the technology that Mr. Kawase presented became the inspiration for many new innovations and applications, and the name “Kawase” can still frequently be heard at real time 3D graphics technology lectures at GDC and SIGGRAPH. After that, Bunkasha withdrew from the gaming industry. In contrast, Mr. Kawase, along with several core R&D members of “Wreckless”, moved to Silicon Studio.
“The first project I got involved with after joining Silicon Studio was YEBIS. At the time and even now, I think YEBIS is the only real time 3D graphics middleware system specializing in post-processing and designed for game graphics. So I began working on development in a field with no real competition. Since this was a field that had been both a personal hobby and a paying job for me, I had done many different things and accumulated various technology demos and the like. So I had a plan that I could organize them and reconstruct them into a middleware system without taking too much time. In the end, I was able to create my first prototype in under a month. Well, I do have to admit it took a fair bit of time after that to clean it up so it could be sold as a product.” -Mr. Kawase
Currently Mr. Kawase is doing technology support not just for YEBIS, but for a wide range of middleware development in Silicon Studio. Naturally, he still has a deep connection to YEBIS and gets directly involved with R&D work and direction when new technology is added to YEBIS’ features.

YEBIS is a real time 3D graphics post-processing middleware system specializing mostly in game graphics. Most of the post-processing it handles includes effects and so it is placed in the category of “post effects middleware.”
Most people are aware that post-processing is a kind of “touch up” effect, but there are probably many people who do not really understand exactly how these may appear in actual game graphics. For that reason, rather than giving a difficult technical explanation, I will simply show the kinds of effects applied to the original images through the use of screenshots and movies.
“YEBIS 1.0 was first released in 2006. After many version upgrades, it is now at version 1.5 which was released in 2009. 1.0 included the basic HDR (High Dynamic Range) effects Glare and Bloom, and the basic optical expression DOF (Depth of Field). When 1.5 came out, advanced optical expressions, such as Gaussian Blur, Motion Blur, Airy Disk, Vignetting and lens distortion, were added.” -Mr. Kawase
The most basic post effect is changing the color tone of the rendering effect. This is a perfect example of where post effects meet photo retouching.

Original render (left); monochrome (right)
Sepia tone (left), violence tone (right)
Color tone changes in real time
I should probably explain "violence tone" a little better. It's a bit hard to understand when you see a standalone image like this. When conditions are normal in a video game, the color tone is also normal, but when you're being attacked by an enemy or the player has taken damage, changing to a stronger, richer color tone is a good way to convey a sense of danger to the user.
Depth of field expressions are absolute necessities when trying to achieve photo realistic visuals. From a production point of view, they are also an important method for letting the player know where on the screen they should look.

Close-focus: focus is on character (left); Mid-focus: there is nothing contained within this focal length, so the overall image is blurry (center); Long-focus: background is focused (right).
Depth of field can also be intentionally manipulated and, by reducing the scope of the focus to a very small range, you can achieve an effect just like tilt-shift photography.
Original render (left); tilt-shift effect (right)
Among the post effects features offered in YEBIS, one of the most attractive ones is the Glare expression.
"Glare comes with a variety of preset options, or you can fine tune your own settings by choosing to 'select number of light streaks ' or 'change color of light streaks'." -Mr. Kawase
The photos below show the original rendering effects as compared with the preset YEBIS Glare effect. The greatest appeal of YEBIS is that it can create visuals that are not only artistic, but also convincingly realistic.


Original render: the white part sticking out at the bottom left (sun) contains high brightness radiation information (left); circular bloom (center); high scatter, 4-directional streaks and lens flare (right).
6-directional streaks and lens flare (left); anamorphic flare and lens flare (center); smear and lens flare (right).
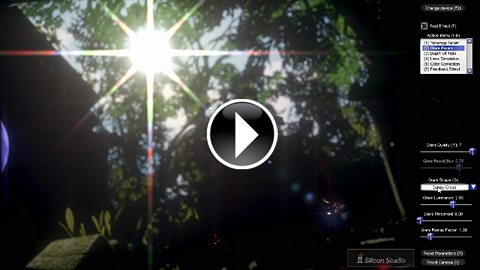
Demo showing various types of glare effects. From a simple bloom to an additional lens flare, you can see multiple light streaks separating into different colors.
One type of virtual image phenomena that occurs due to the reflection inside the lens when the lens is capturing a very bright scene. YEBIS calculates and then creates a relatively accurate virtual image. An anamorphic flare occurs when a light source shines directly into the lens, and creates long horizontal light streaks. A smear is a phenomenon that occurs when the CCD/CMOS image sensor becomes saturated and causes overflow. This happens easily with phone cameras and compact digital cameras. I'm sure some of you have experienced it before.
Motion blur is an effect that gives you the feeling of the speed or trajectory of a moving body. It's a post effect that you see often in games these days.
Original render (left); motion blur applied (right)
YEBIS uses both the relatively serious method in which the motion vector of the pixel units is acquired and then blurred, and the "feedback blur", that was seen often in the PS2 days, in which the previous frame is retained but faded out as the new frames overwrite them. The feedback blur sample movie below has a psychedelic feel to it and features not just a feedback blur effect, but also a color tone change.

Original render (left); feedback blur with image rotation/magnification applied (center); feedback blur with rotation/magnification/hue/saturation/contrast changes applied (right)
The new optical effects that are included in YEBIS version 1.5 represent real optical phenomenon that were researched by Mr. Kawase using actual lens. As a result, the effects have an extremely authentic feel to them.
One of them is Lens Distortion, a post effect unique to YEBIS. Lens Distortion is an optical phenomenon where the further you approach the perimeter of the image, the more it swells or shrinks. This happens easily with zoom or wide-angle lenses. The swelling is referred to as "barrel distortion," and the shrinking is referred to as "pincushion distortion," both the bane of photographers. In YEBIS, when this effect is simply used, it just adds particular distortion to the rendered image, but if it is used well, it can have the effect of reducing an overly "CG-type" look.
In general, real time 3D graphics work by recreating the camera view of a 3D model that has been programmed into a virtual computer space. When this happens, perspective projection transformation occurs. In the process, the 3D objects that are being displayed in the virtual space are projected onto a 2D surface of the screen. But the truth is that this process creates a widening gap between how the CG appears and how the real world is perceived. In CG, a side effect of this perspective projection transformation is that as you get closer to the edges of the image, a distortion like a Mercator's projection is strikingly obvious.
By applying the YEBIS Lens Distortion rendering effect in just the right amount, you can reduce the effect of this CG-type "stretching of the image borders."
"You can recreate the feeling of looking through an ultra-thick lens with this Lens Distortion post effect by conversely applying abnormal parameters." -Mr. Kawase
Original render: perimeter of the image is stretched out due to perspective projection (left); Lens distortion applied: image close to that of actual field of vision (center); Example of conversely applying abnormal lens distortion: makes image look as if it is being viewed through a thick lens (right).
Vignetting is also a rather simple effect, but one that is a characteristic feature of YEBIS. This effect recreates the phenomenon when the borders around the center of the image become darker than the center. With YEBIS' shader effects, it is not simply a quasi-darkening of the perimeter, but an actual implementation of vignetting, in an optical sense, by applying parameters to the diameter and length of the photographic lens as well as the aperture value and the like.
For example, the following screenshots show the F128 effect, but you should be able to see that the focus is slightly off. This is because it is a recreation of the F128 pinhole camera taking a photograph at the smallest possible aperture setting. Optics with an aperture that small causes the depth of field to become deeper and the effect of the light diffraction dominates, causing the optical resolution to deteriorate. This is specifically called "small aperture blur."
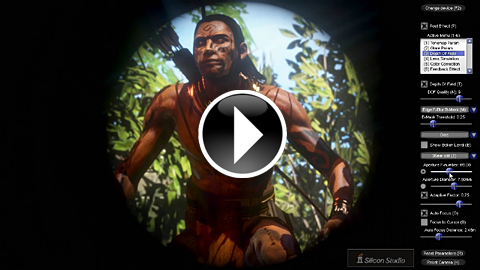
"This isn't just the case of applying a round black mask to give the appearance of looking through a long-distance scope. It's the effect of simulating a long, small aperture lens which results in a vignetting effect due to the lens tube, and creating an image centered around a black mask. It may sound complicated, but for a person who understands photography and optics, YEBIS actually might be easier to understand." -Mr. Kawase
Slight vignetting due to the lens tube (left), in the case of a long lens tube such as a long-distance lens with an F-stop setting of F5.6. You can achieve the effect of a rifle scope (center), the effect of the same long distance lens with an F-stop of F128. The smaller aperture gives a clear-looking vignetting effect, but due to the light diffraction, the overall image is blurred (right).
Vignetting simulation based on use of optics. Notice that by changing the aperture size in the latter half, you can achieve not just vignetting, but also alter the depth of field.
These kinds of post effects simulate optic systems like lenses and can be used to express the depth of field.
Below are examples of expressing the depth of field by using YEBIS to set the F-stop setting (F), focus point and focal length (f). Unless you compare them closely it will be hard to see, but by shifting the focus point either forward or behind, the depth of field changes. This is a phenomenon that is possible with an actual lens and one that can be recreated using YEBIS. So in an event scene in a game, where a spy camera needs to be zoomed in and out to achieve the right focus, YEBIS can produce highly realistic results.


F:1/1.68, focus point: 82.5cm f: 103.5mm (left); F: 1/1.68, focus point: 98.0cm f: 106.7mm (center); F: 1/1.68, focus point: 127.9cm f: 110.9mm (right)
Another filter, which is a simple but effective method for creating various blur effects, is "Gaussian Blur." This is a feature that allows you to add a blur effect to the entire screen.
Generally, the Gaussian Filter, which is commonly referred to as Gaussian Blur, causes a pixel color's influence to weaken and scatter as it goes further towards the outline. It's commonly included as a standard feature in image processing software for creating a blur effect.
Blurs created with Gaussian Filters are difficult to implement in real time when they have a large radius because of their large memory demands. And so, in YEBIS, we have expanded on the "Kawase Method MGF (Multiple Gaussian Filter) concept to make it possible to create Gaussian Blurs of any size and in real time.
Let me explain a little further. The Kawase Method MGF is a technique in which the target to be blurred is extracted into multiple low resolution buffers. A Gaussian filter is then applied to them and they are expanded and combined using bilinear filtering.
"Since YEBIS uses a technique similar to MGF where, if the Gaussian radius is large, the buffer resolution is lowered, users are able to create Gaussian Blurs of any size in real time with no limits. However, if you simply lower the resolution of the buffers depending on the blur radius, when you try to smoothly change the blur radius there may be some slight popping in the area where the resolution was changed. So, after applying the blur at near 2 levels of different resolutions like MIPMAPs , the results are interpolated." -Mr. Kawase
Applying a giant Gaussian Blur like the one shown in the screenshot, with a standard deviation σ=64 in real time, is extremely difficult. But thanks to the method used in YEBIS, even larger sizes can be executed in real time with no problem at all.

Traditionally one would want to make large changes to the filter radii size by using multiple Gaussian filters, but the processing load is too high. So the Kawase Method MGF is to implement them at the same filter radius using low-resolution buffers. It is an application of reduction buffer technology.


Without Gaussian Blur (left), Gaussian Blur with standard deviation of σ=16 (small scale blur) (center), Gaussian Blur with standard deviation of σ=64 (large scale blur)
"Speaking of reduction buffers, we've added something to YEBIS so that the jaggies, that normally appear when a reduction buffer is used, don't stand out." -Mr. Kawase
The reduction buffer technique places semi-transparent effects overlaid and concentrated in a low resolution level, and then magnifies them to the final output resolution and composes them together in the main rendering effect α(alpha) . It's to be expected that if you magnify low-resolution images, you'll see jaggies.
"I presented in detail at the CEDEC 2009, so I'd like you to look at the materials from that, but you can greatly minimize jaggies by first blurring slightly at an in-between resolution and then magnifying. YEBIS also uses the reduction buffer technique for Glare and Depth of Field effects, but I think that jaggies are virtually unnoticeable. That's the benefit of this technique." -Mr. Kawase


Magnified bilinearly as-is (normal method: creates artifacts) (left), and decreased reduction buffer artifacts by using magnifying and blurring (right). Compared with a highly reduced buffer (image with noticeable jaggies) to understand the effect more easily.
"The soon-to-be released version 2.0 will be compatible with DirectX 11. God rays, chromatic aberration, heat simmer and post process type anti-aliasing like FXAA will also be added." -Mr. Kawase
God ray is an effect where streams of light flow out from a high luminance area along the light direction. This is a post effect that appears, at first glance, to have been done with volume rendering.
In order to realize this, we first create a mask with a depth buffer that remains after the scene is rendered, to occlude the high luminance source. Next the high luminance source is blurred in a radiating pattern from its place on the screen and then removed later with a mask. This way, you can make lights and shadows stretch out while showing the influence of occluding objects.
Original render (left); God Ray post effect added (right)
In the following screens, it may be a little hard to tell, but you can see a concentric rainbow-colored corona from the high luminance area. This is a representation of the light diffraction caused by particles in the atmosphere. However this was not created by simulated effects, but added as an artistic inspiration. In YEBIS, this type of corona can be fully controlled from adding multiple rings, strengthening it, damping it, or changing the direction of the dispersion. Depending on the way it is applied, you can also create the appearance of a Lenticular Halo.
Original render (left);God Ray post effect added (right)
"With this method, if the occluding objects are simply shaped, the rays tend to be thick, but by adding noise to the mask, you can make it so that sharper, thinner rays come out." -Mr. Kawase
Speaking strictly about its effect, "Chromatic Aberration" is a phenomenon that occurs when colors shift due to light entering the lens. It is caused because the wavelength of light differs for each color, and if the wavelength is different, the refractive index differs. In other words, depending on the color of light that passes through the lens, it forms images at differing focal points and the focus position changes. This is the cause of chromatic aberration. You may perhaps have seen the keyword "anomalous dispersion" when looking at a catalog of digital single reflex cameras lenses or the like, but it is one method for reducing chromatic aberration.
YEBIS supports something called "chromatic aberration of magnification" where the further you go from the center of the image, the greater the chromatic aberration becomes. You can get an extremely realistic feeling of looking through glass (or a lens?) that can be a lot of fun for use in storytelling.
Original render (left); chromatic aberration expression that causes a color slip the further to the outside you go (right).
"Post-processing type anti-aliasing" carries out anti-aliasing in an image processing-like way by not looking at such things as depth information, but instead looking at the change in details such as the luminance of the actual render. Because this can be implemented efficiently and at a fixed budget, this method started to be adopted widely for PlayStation®3 and Xbox 360® games starting about last year. Influenced by this trend, YEBIS has also started to support this approach to anti-aliasing.
"Post-process anti-aliasing also has the advantage of being able to reduce the jaggies that MSAA (multisample anti-aliasing) is unable to fully deal with." -Mr. Kawase
The popularly used MSAA anti-aliasing process is used to reduce the jaggies on outlines determined by referring to the depth buffers. Not just for YEBIS, but because general post effect processing is involved in every type of mask processing that falls outside this category of anti-aliasing, there is the possibility that MSAA may not work.
In actuality, for shading processing of the out of focus area in the YEBIS depth of field expression, mask processing is performed to prevent the seeping out that ignored the render context. But the border region of that mask is not handled by MSAA. However, because FXAA type post-processing anti-aliasing is just simple image processing, it will do a fine job reducing the jaggies remaining in the borders of the masked area.
Original render (left); after post-processing type anti-aliasing is applied (right)

Magnified original render (left); magnified photo after post-processing type anti-aliasing is applied (right).

Mr. Kawase commenting as he watches the demo
YEBIS is middleware so you need a way to integrate it into the game program. When you say graphics middleware, there's an image of it being difficult to link/integrate with the graphics engine on the programing side. What can you say about that?
"YEBIS is a middleware system specifically for post-processing, so it's extremely easy to integrate into graphics systems. As a matter of fact, it is actually possible to integrate it into an already completed game. When new customers are considering installing YEBIS, one of the things they often do, as an experiment, is to try to integrate old completed/released games. That reinsures them it is easy to implement." -Mr. Kawase
YEBIS simply takes the render target from the game program side and then processes it according to the parameters that have been set up, so it is highly independent. The graphics engine part on the game program side acts as if there is no YEBIS, and can simply render as normal.
To be more concrete, you only need a "begin~end" method to assign post-processing with YEBIS for anything rendered with the code block that controls the game program's rendering.
"One other advantage that makes implementation easier is that it is relatively easy to estimate the post effect processing time. Also, by adjusting the performance and parameters, you can make sure it is a good fit for your needs." -Mr. Kawase
Since the post effect is applied to the resulting image, it is basically not dependent on the complexity of the scene. This means there's virtually no fluctuation in the processing time for different frames (almost constant). As a result, when you design the game you should decide the frame rate, how much rendering time is needed per frame and then estimate how many milliseconds will be spent on post effects. Once you've done that, you can fill it with as many post effects as you like within that range.
As I mentioned earlier, YEBIS is equipped with various HDR (High Dynamic Range) rendering base post effects. Which means that the programmer side rendering pipeline must be designed with HDR in mind.
To help with this, YEBIS provides three broad possible solutions.
The first is "real HDR rendering." With this solution, post effects are applied to images that have been rendered in a 16-bit floating point (FP16) format. The pre-processing game graphics to input into YEBIS must have HDR information in FP16 format. This solution would compromise the least in terms of quality of the post effects achieved, and would be best suited when used on high spec hardware or for a PC game or arcade game.
The second solution is "simulated HDR rendering." This uses a general LDR (Low Dynamic Range) format with 8-bit integer RGB and assumes the use of HDR with a compressed luminance range. Generally, if the compressing luminance is dealt with 8-bit integer RGB, a Mach band tends to be induced in gradation expression, but with YEBIS, this method has taken a step forward and now handles the compression of the luminance range non-linearly. To be more specific, it uses a tone mapping-like smooth function that heavily compresses the extremely bright areas and leaves the dark areas almost uncompressed, so that the mach bands hardly occur at all.
The graphics engine on the game program side must perform scene rendering with a compressed HDR format for the luminance range postulated by YEBIS. This solution arranges the HDR information properly in a pipeline considering its light processing load, and results in high quality post effects. It's a clever solution on current systems like the PlayStation®3 or Xbox 360® where "Real HDR rendering" is somewhat hard to handle.
The third solution is "pseudo-HDR rendering." This is a broad-minded solution that uses the 8-bit integer RGB LDR format, but "the game side graphics can be created without HDR in mind at all." In other words, this means that the game program side can go ahead with an LDR rendering pipeline without any consideration for HDR.
With this solution, the LDR frames input into YEBIS are analyzed and output into an HDR-like frame. To give a rough example, of the 8-bit expressions in 0~255, the closer to 255 you get, the more it is viewed as high luminance and processed that way. In this case, just like in simulated HDR rendering, non-linear functions are used and there is no threshold processing for "values over 240 viewed as high luminance." You could say that this is a useful solution for making game programs based on existing LDR rendering come off as HDR-like.
"That's not physically correct, but that's the kind of effect you get." -Mr. Kawase
We're comparing with an image that contains high luminance components that should make it easy to see a difference. Even with this amount of high luminance components, it's possible to do simulated HDR without hardly any noticeable defects.


Simulated HDR can have very realistic results even with images rendered in LDR
For YEBIS, unlike their particle effects middleware "BISHAMON", there is no tool such as a design tool. For that reason, the design work of setting parameters for YEBIS post effects to be used in rendering is done by integrating YEBIS with the tools that are used internally by the game development studio (or game development team).
By choosing the "pseudo-HDR rendering" option, I think you can probably create impressive and beautiful graphics without much trouble at all if you simply use YEBIS, even without much artistic ability and just by programming. In actuality, there are many customers who use YEBIS presets and samples as-is.
"One of the characteristics of YEBIS is that each of the post effects that it presents offers a massively wide-range of options in terms of quality and performance. You can add effects that are so high quality and rich that it is useless because of its slow speed. But even if it's impossible now, it's quite possible that, with advances in hardware, it may be possible to run in real time in the near future, so you can go ahead and make it for use sometime in the future." -Mr. Kawase
Perhaps you could say that this makes YEBIS "long-lasting" or "temporally durable." This "temporal durability" can be used to develop on the current temporal axis. It can be used to develop for multiple platforms with various levels of hardware performance. Just by changing the parameters on the YEBIS base effects that you've implemented, you can easily adjust them to match the capabilities for each platform.
For example, you may be developing a single game for multiple platforms such as PlayStation®3 and PlayStation®Vita. Both are suitable for using the programmable shader 3.0 (Shader Model: SM3.0), and although both come from the same generation of graphics architecture, clearly the PlayStation®3 has a much higher performance capability. In this case, you will want to set up richer post effects in YEBIS for the PlayStation®3, and lower the quality somewhat for when the PlayStation®Vita version in order to give preference to performance. For game developers, this makes things much easier because instead of working to individually make the post effects suitable for each platform, they can simply adjust the parameters on YEBIS and reduce both the development time and cost.

Mr. Kawase speaks about the future
YEBIS is by nature a middleware system and although not all the names of the titles which use it are made public, as of January of 2012, Silicon Studio announced that it was being used for Square Enix's "Gunslinger Stratos", Koei Tecmo's "Dynasty Warriors 6" and Japan Software's "The Witch and the Hundred Soldiers".
Also, it is currently compatible for use with amusement system platforms including PlayStation®3, Xbox 360®, Windows PC, Linux PC, pachinko and arcade games. It will soon be available for development for Android and iOS smartphones. In addition, the range of uses of YEBIS will broaden even more due to its inclusion as the standard post effects engine for the all-in-one game engine "OROCHI" released last year by Silicon Studio. It also appears that, at the moment, YEBIS' compatibility for the PlayStation®Vita will be through OROCHI.
YEBIS could be called a world-class makeup artist in terms of its role in raising those games to the highest possible level of graphics quality. YEBIS, packed with the greatest graphics technology from Japan, is also ready for the direction that graphics evolve in the future. In conclusion, we asked Mr. Kawase about this.
"In the future, I am thinking of implementing some of the technology that I presented at past CEDECs that has not been implemented yet. Also, I intend to continue researching the post-processing applications for new features that have come out since DirectX 11. A middleware system specializing in post effects is still rare on the world stage, so I plan to proceed with expansion into the overseas market as well." -Mr. Kawase


©Copyright. Silicon Studio all right reserved.

YEBIS is a trademark or a registered trademark of Silicon Studio Corporation.
“PlayStation Family Mark”, “PlayStation”, “PS5 logo“, “PS5“, “PS4 logo“ and “PS4“ are registered trademarks or trademarks of Sony Interactive Entertainment Inc.
Other company and product names used herein may be trademarks of their respective owners and are used for the benefit of those owners.
Follow us


